Friday 9 November 2012

Building the Stairs (part 1)

Having got the stringers to size I made a jig to mortise out for the treads
Using a collar on the router


And another to mark out the angle of the treads, so they are at least all the same

This took a couple of attempts to get the mortise a nice snug fit. Bear in mind not too tight so I can get the thing together and glued


What it should look like


In place an levelled up, just to check


And an idea of what they will look like


And yesterday the tiles arrived for the kitchen. Laid out dry to see what they look like. I particularly like the fact they vary in shade. Should make a nice floor! 


Way up high

Fitting the new liner for the Chimney. For info that's about 11 metres


Getting up was a little tricky, in the end I cut a hole in the piggery roof and made some staging to work off. That way my ladder was just long enough. I could have gone up the roof but didn't want to risk breaking all the new tiles! Also gave me a change to see how bad the roof of the barn is. It's bad, and needs doing sooner rather than later.


Fortunately the chimney is big and quite straight so I could put the liner up the chimney. Last time I did this I dropped it down from above and it was a git to do. The liner is flexible but not very, so curving it round and down while 11 metres up on a ladder holding all the weight is not easy. Pulling it up was a doddle by comparison thanks to the able assistance from Julia and the kids.


The liner ready for the stove


Tuesday 16 October 2012

Big Wood

Started the staircase stringers at last. I managed to get some really nice kiln dried oak from Granville Bois in Villedieu des Poeles. Cutting it was a bit of a swine and planing it was even more fun.  Had to get our neighbour Alison to lend a hand but we got the job done and I now have two nice clean blanks to lay out for the treads. The large piece of wood on the left is.... Ahem....spare.


And again with Libby to give some scale


On a completely different note, I found this in the skip at the tip....I thought it worth saving. I'm sure I can make it into something nice, maybe a mirror?


Thursday 4 October 2012

Screed

As the day unflolds;


Job Done!


Under floor heating

Well the time has come to do the floor in the kitchen. First of course we had to de-camp the kitchen into the salon. After that there was was a little reparation to do to the floor where the window seat will go and then down with the insulation:

This starts quite easily but gets harder as you have to cut more boards to fit into door and windows. The board i'm using is a French product desinged for underfloor heating. Its EFISOL in 56mm thickness.
All in all it took about a day to lay the boards and then fit the insulation round the edge


 Next was the pipework. This was a kit off the internet and I have to say the quality of the kit was very good, a good branded kit, delivered next day and clear instructions. There are loads around but mine came from: http://www.theunderfloorheatingstore-onlineshop.com


 The kit comes with the manifold and all the tools to cut the pipe.


 Now ready for the screed..


Friday 21 September 2012

Landing zone

Well it might seem like a trivial job, creating the landing between the new floor and the rest of the house, but like most of these things it took a bit of thinking about. The good news is its in, and now I have a fixed measurement to make the stairs.

The frame under construction

The observant among you will see the landing wraps round the opening. This is so if your dashing through your foot doesn't slip down the stairs. I pondered this for a while, since making a socket for the joist was not going to be easy. Sometimes the stones fall nicely for you and you can remove one or two stones to make a socket in the right place. Not this time; I had to smash the corners off two big stones to make the socket. This was slow and time consuming but not as time consuming as thinking about it any longer. At some point even if your not sure how it's going to work, if you wade in with a big hammer, the solution usually "reveals itself"


The other end of the joists are supported by a ledge nailed to the beam. A word of caution at this point; If you need to hammer nails into old oak, they are "as hard as nails" so you need to drill a pilot hole first. Oh and I would recommend using a lump hammer too, two handed and have plenty of tea handy. Lastly while I'm preaching, if you use a sharp twist drill and clear the wood from the flutes of the drill bit two or three times for each hole then you won't burn the wood. In extreme cases the drill bit can get so hot you risk setting fire to the wood / beam / house.


And here the landing boarded out


You can even walk on it.

Having got the landing done I set about reclaiming the wood for the stairs. I bought an old staircase about a year to 18 months ago. Primarily because it had nice wide oak boards (300mm x 30mm). They looked a mess with varnish and glue for stair carpet and nails all over the place. But having gone through the pain of cleaning them up, the timber is superb, clear, flat and seasoned. New timber like this is prohibitably expensive if you can find it!

Here are the stair treads before:


A riser in progress:


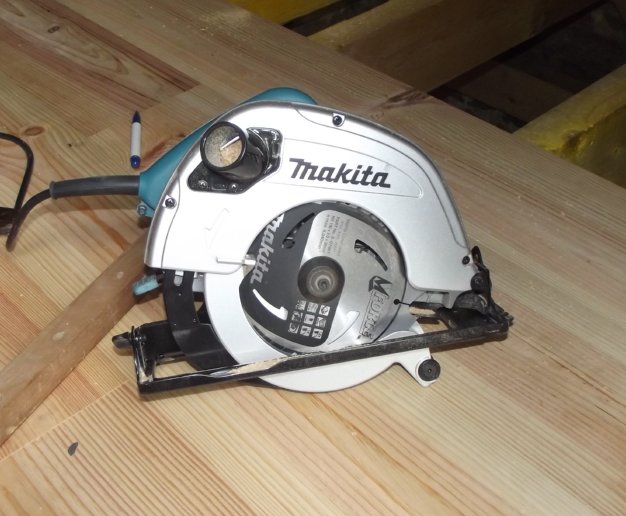
As you can see I've used a cheap hand electric planner to get off most of the crud, leaving my thicknesser to do the rest:
This is the DeWalt 733. For site work it's really excellent and the finish is great. Every home should have one. Below is the result


13 treads and risers and not a knot in sight


And enough left over to fill 12 baskets


For the rest of the staircase I have found a place that can supply the wood for the stringers; Granville Bois. These boys will supply a 5m board 41mm thick in kiln dried timber (French oak). The only snag is I want 300mm wide and I've had to accept two pieces 150 wide and glue two boards together to make each stringer. This should however give better stability over time. Either way its Hobson's choice, that's what they have. There is going to be a small landing at the bottom of the stairs and the balustrade will be in my own welded funky iron work.

After all "How hard can it be".......


Thursday 30 August 2012

Monday 27 August 2012

Tinchebray Prison

Dates from around 1750..


The courtroom used until the 1970's


The chapel 


The Church St Remy, built by the English in around 1050


And the local laundrette 


Sunday 19 August 2012

Rangement

Time to get organised so here is the assembled shed. OK its not blue, but it will allow me to clear out the salon ready to build the staircase. It was 32 degrees yesterday and today and lord knows what in the sun so it was a bit of a struggle, trying not to fry.

I'll fit the shingles for the roof over the tar felt sometime later.....

Monday 13 August 2012

The most important thing

Family.

At the stroke of midnight

The floor is finished (well all the boards are down). Just in case you ever lay a board floor and like me you don't have a floorboard clamp (like me) here is how you can add lib and make a reasonable floor clamp:
Two pieces of softwood and a g-clamp do the trick.
For the floor I'm using cut floor brads. Turns out these are not available in France so I had to import the nails from England. This may sound a bit excessive but trust me they are the very best nails for the job. Because of their shape they pull the board down nice and tight, something any other nail will not do. If your wondering why there are two hammers in the picture that's just to illustrate the difference between an English and a French hammer. They both have their place but being an old fashioned kind of guy I still prefer the weight and balance of the English hammer. Especially for a floor where square "rose buds" just look wrong.
As an aside I love my new saw. The quality of Makita tools is just staggering, and made in England too. Considering it was just 20 pounds more expensive than the cheap Chinese stuff, I think its well worth the difference.
The finished floor; OK there are tools still strewn about the place but hey is was midnight by the time I put the last board in! Tired now......going to bed.